Setup of an Astro blog
I think it’s interesting to try out different blogging platforms. WordPress is really powerful and versatile, but I think there is a few drawbacks also that Astro can solve.
- Security – As the largest web platform it’s always a target for hackers. And when you are depending on third-party plugins that aren’t always security tested there is a big risk that vulnerabilities are introduced.
- Keeping up to date – To be secure you need to always have your base installation and all plugins up to date. This requires updates often many times each week with the risk of breaking changes.
- Performance – You can get good performance on your WordPress site, but it often comes with expensive hosting and that you keep your plugins down to a minimum. Sometimes it can be really hard to get top-notch performance.
Why Astro?
I think the main points for choosing Astro as a blog platform are:
- Performance – It’s very lightweight and in all tests, it performs really well!
- SEO – Since you mainly server-side render the pages it’s optimized for SEO.
- Customizable – It’s only you and your own skills that set the limits.
- Hosting – You can host it for free on for example GitHub Pages, Netlify or Vercel.
Preconditions
- Some knowledge of CSS, JavaScript, and HTML
- Texteditor – I use Visual Studio Code
- Git
- Node.js
Choosing Astro Theme
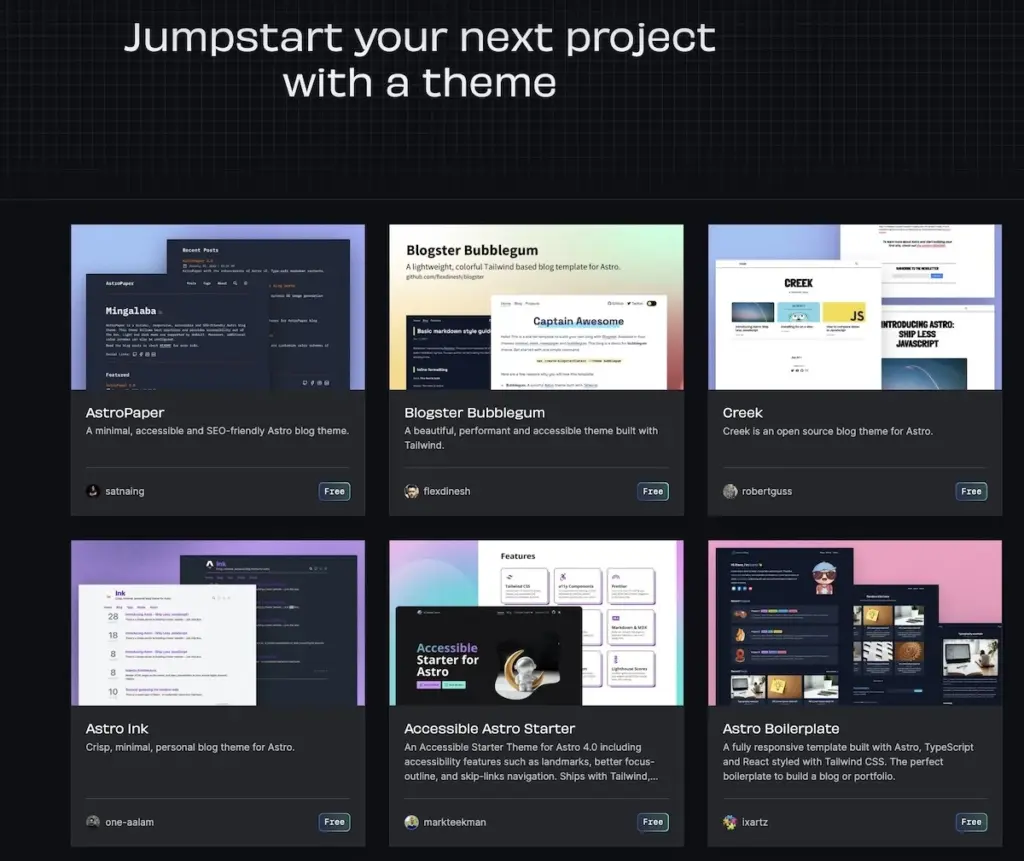
Head on over to Astro themes, there are a ton of different good-looking themes.

On this blog, I ended up using Accessible Start for Astro created by Mark Teekman. The main reasons for me choosing this theme was.
- I think it’s really good-looking
- It uses Tailwind CSS for styling
- That it’s accessible I think should be a plus when ranking at Google.
- It has over 500 stars on Github and issues seem to get solved fast.
I think the most important thing if you choose another theme is to make sure it has a good amount of stars, you can see that as a quality mark.
Even if you choose another theme there should be a lot of similarities regarding the setup.
Let’s get started
Open up your terminal and clone the team you selected.
Step 1 Clone the repository
First, clone the repository to your local machine. Open your terminal (Command Prompt, PowerShell, or any terminal in macOS/Linux), navigate to the directory where you want to clone the repository and run:
git clone https://github.com/markteekman/accessible-astro-starter.gitNow you have the code, but before making any changes you want to rename the project to your name and push it to your repository.
Step 2: Rename and initialize
After cloning you should rename the project, disconnect it from its original repository and, initialize a new repository. Replace MyAstrProject with something suitable.
mv accessible-astro-starter MyAstroProject
cd MyAstroProject
rm -rf .git
git init
git add .
git commit -m "first commit"
git branch -M main
Step 3: Create a new repository on GitHub
Go to GitHub and create a new repository with your desired project name. Do not initialize it with a README, .gitignore, or license since your project already contains these files.
Step 4: Link your local repository to GitHub
After creating the new repository on GitHub, you’ll be given a URL for that repository. Use this URL to link your local repository to GitHub with the following command, replacing YOUR_GITHUB_USERNAME and YOUR_REPOSITORY_NAME with your actual GitHub username and the name of your new repository:
git remote add origin https://github.com/YOUR_GITHUB_USERNAME/YOUR_REPOSITORY_NAME.git
git push -u origin master
Step 5 Install dependencies and run
You’re almost there, having a blog up and running on your local machine.
npm install
npm run dev
That’s it, open up your browser and visit http://localhost:4321/ 🚀

Looking Great ⭐️
Modifications I have done
Minor modifications
- Changed the name of the site by updating the following files
- Footer.astro
- Navigation.astro
- DefaultLayout.astro
- SiteMeta.astro
- Updated the hero section (Generated a new image with the help of ChatGpt with inspiration from the original image, pretty cool 🤖)
- Hero.astro
- Removed the menu items I didn’t want.
- Navigation.astro
Blog post structure
When writing my blog posts I will mainly do it in markdown and maybe in some cases mdx files. I want my blog posts to be neatly organized, so I use Content collections and I group each post with its images in a separate folder.

I want the blog posts to be served under the URL ../blog/name-of-the-post. To make that happen create a new file
src/pages/blog/[...slug].astroWith the following content
---
import { getCollection } from 'astro:content'
import MarkdownPostLayout from '../../layouts/MarkdownLayout.astro'

export async function getStaticPaths() {
  const blogEntries = await getCollection('posts')
  return blogEntries.map((entry) => {
    // Remove the directory name from the slug
    const newSlug = entry.slug.split('/').slice(1).join('/')
    return {
      params: { slug: newSlug },
      props: { entry },
    }
  })
}

const { entry } = Astro.props
const { Content } = await entry.render()
---

<MarkdownPostLayout frontmatter={entry.data}>
  <Content />
</MarkdownPostLayout>
Ps. This strips away the folder name from the URL, I think that makes our site look better from an SEO perspective.
The last step is to edit the main page at src/index.astro, remove all existing content and instead add a section that displays the latest three blog posts written sorted by date.
---
import { getCollection } from 'astro:content'
import Card from '../components/Card.astro'
import Hero from '../components/Hero.astro'
import DefaultLayout from '../layouts/DefaultLayout.astro'
const allPosts = await getCollection('posts')
allPosts.sort((a, b) => new Date(b.data.pubDate) - new Date(a.data.pubDate))
---

<DefaultLayout title="Home">
  <Hero />
  <section class="my-16">
    <div class="container">
      <h2 class="mb-16 text-6xl">Posts</h2>
      <div class="grid grid-cols-1 gap-12 md:grid-cols-2 lg:grid-cols-3">
        {
          allPosts.slice(0, 3).map((post) => (
            <div class="feature flex flex-col gap-4">
              <Card url={'/blog/' + post.slug.split('/').slice(1).join('/')} title={post.data.title} footer={''}>
                {post.data.description}
              </Card>
            </div>
          ))
        }
      </div>
    </div>
  </section>
</DefaultLayout>
Right now you should have a pretty decent start, so let’s end it here and do some follow-ups regarding deployment, SEO, and, so on.
You can find the complete code on GitHub.
Have a great day and happy blogging!


